Solar is what makes a van build self-sufficient. Get the sizing and type right and you can park for weeks without worrying about power. Get it wrong and you either run flat by mid-afternoon or spend money on panels that underperform because they were the wrong type for the roof.
This guide covers the three types of van solar: rigid, flexible, and foldable. How to work out what you need, what efficiency actually means in real-world use, and the matching rules that catch beginners out before they spend money on incompatible gear.
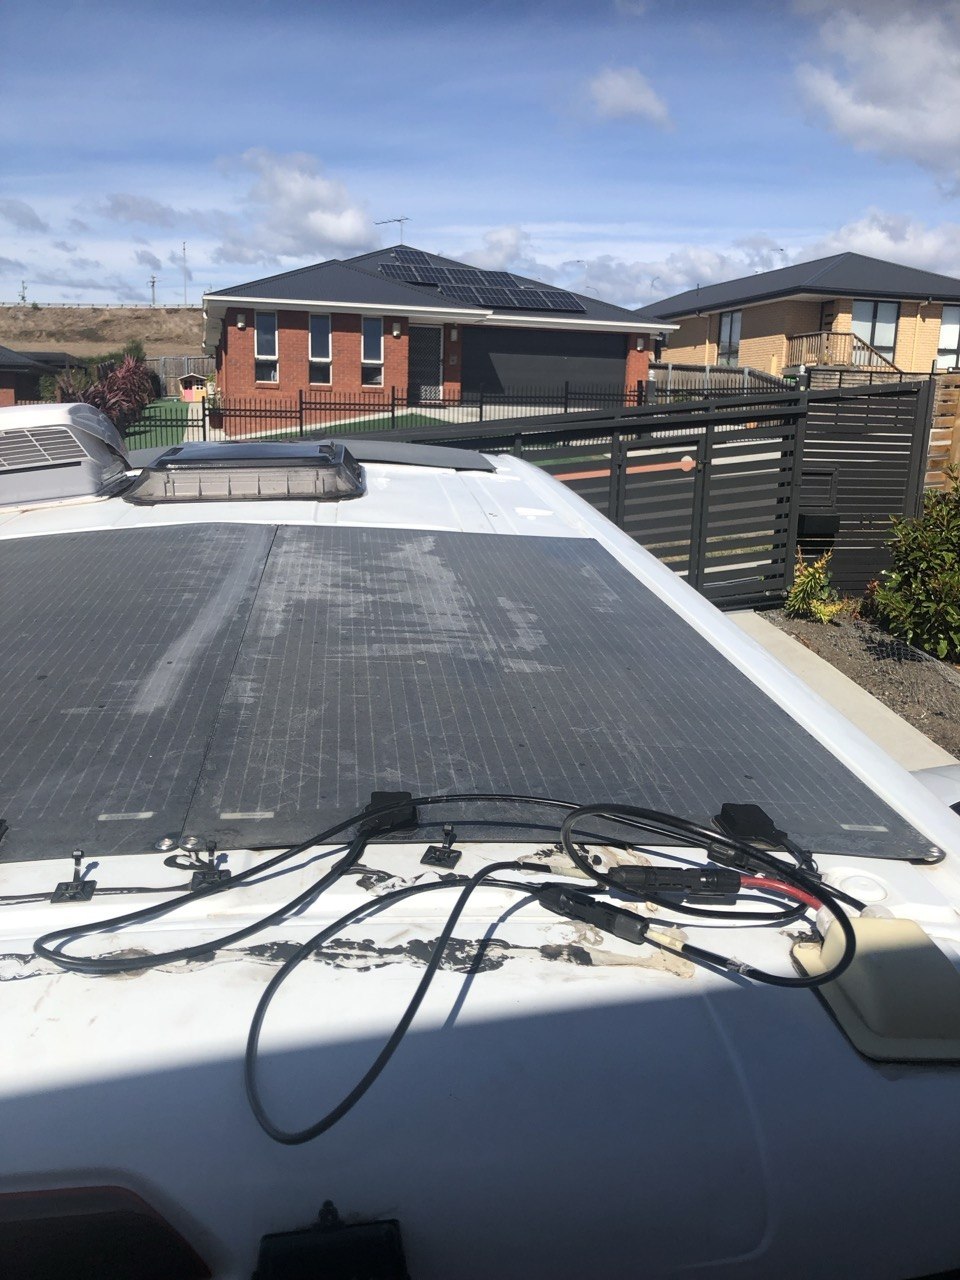
First build — three 160W flexible panels glued to the roof. Covered the basics but struggled once I added cooking and a laptop to the daily load. I eventually pulled them off and switched to rigid.

Second build — switched to rigid panels. Immediately better output, no overheating, and the air gap under the brackets keeps them running cooler and more efficiently in summer.
Quick picks by setup
Affiliate links: if you buy through these I earn a small commission at no extra cost to you. The price you pay is the same either way.
What panel efficiency actually means
Every solar panel has an efficiency rating, typically somewhere between 15% and 23% for panels sold for van use. This number tells you how much of the sunlight hitting the panel surface gets converted into usable electricity.
A standard test condition (STC) assumes 1000 watts of sunlight per square metre hitting the panel. A 200W panel with 20% efficiency has roughly 1 square metre of surface area converting 20% of that 1000W into power. Real-world output is almost always 70 to 85% of the rated figure due to heat, shade, angle, and cloud cover. That rated figure is still what you use for sizing.
Monocrystalline
20–23%Single silicon crystal cells. Highest efficiency, best in low light, most common in quality rigid and flexible panels. The standard for van builds.
N-Type Mono
22–24%Newer cell technology with better heat performance and lower degradation over time. More expensive but worth it for high-output arrays that run hard all year.
Polycrystalline
15–17%Multiple silicon crystals. Lower efficiency and larger for the same wattage. Largely phased out in modern van panels. Avoid if you have limited roof space.
For a van with limited roof space, higher efficiency matters. A 200W monocrystalline panel takes up less roof real estate than a 200W polycrystalline panel delivering the same output. Every square metre counts when you are competing with roof vents, skylights, and walk paths for space.
Winter and cloudy days cut output significantly. In winter, shorter days, lower sun angles, and more cloud cover can reduce your daily solar harvest by 40 to 60% compared to summer. Size your array and battery for the worst month, not the best. A system that runs perfectly in summer can leave you flat by mid-afternoon in winter if you haven't planned for it.
Rigid solar panels
Rigid monocrystalline panels
Rigid panels are the default choice for almost every serious van build. A tempered glass face over monocrystalline cells in an aluminium frame, designed to last decades in outdoor conditions. The frame mounts on brackets that hold the panel 30 to 50mm above the roof surface, which creates an air gap. That air gap is important: solar panels lose efficiency as they heat up, and getting airflow underneath keeps them cooler and producing more power.
The Renogy 200W panel is 1026mm × 764mm (AU) or 1262mm × 764mm (US). Two of these side by side covers the typical roof of a Transit or Sprinter without needing to go over vents. Wire them in parallel to keep the voltage at 12V-compatible levels for a standard MPPT controller, or in series if your controller supports higher input voltage.
Pros
- Highest efficiency for the money
- Air gap keeps panels cool and producing
- 25+ year rated lifespan
- Repairable, can be removed and replaced
- Best watts per dollar over time
Cons
- Requires drilling for brackets and cable entry
- Not suitable for curved rooftops
Flexible solar panels
Flexible monocrystalline panels
Flexible panels use the same monocrystalline cells as rigid panels, but they are mounted on a thin, bendable backing instead of glass and aluminium frame. They conform to gently curved roof surfaces and sit flush against the van with no brackets, no added height, and a much cleaner look from the outside.
The trade-off is heat. Because they bond directly to the roof with no air gap, flexible panels run hotter than rigid panels in direct sun. Heat is the enemy of solar output. Every 10°C rise above 25°C reduces output by roughly 3 to 5%. Over time, the repeated heat cycling also degrades the cells faster. Flexible panels typically carry a 5 to 10 year warranty versus 25 years for rigid. For a van you are planning to keep long term, that matters.
Use flexible panels when the roof profile makes rigid panels genuinely impractical: a pronounced curve, a low-profile stealth build where added height is a problem, or a van where you do not want roof penetrations for brackets. For a flat-roofed Transit or Sprinter going on a serious build, rigid will serve you better in the long run.
Pros
- No added roof height, sits flush with roof
- Works on curved roof surfaces
- Fewer roof penetrations needed
- Lighter than glass-framed rigid panels
Cons
- Lower efficiency than rigid equivalent
- Runs hotter with no air gap
- Shorter lifespan (5–10 years typically)
- Harder to remove and replace if damaged
- Bonding adhesive can fail in extreme heat
Foldable solar panels
Foldable portable solar panels
Foldable panels are not roof-mounted. They fold down to a compact carry bag you stow inside the van, and when you stop you unfold them on the ground, on a camp table, or leaned against the van in the sun. A cable runs from the panel into the van and connects to your MPPT controller the same way a roof panel does.
The big advantage over roof panels is positioning. Your roof panels go where the van goes. If you park in shade to stay cool, the panels go into shade too. A foldable panel can be placed 5 metres away in full sun while you stay cool in the shade. For supplemental charging on top of a roof array, that flexibility is genuinely useful.
Where foldable panels fall short is as a primary power source. They need to be set up and packed away every time you move, which gets old quickly. And unless you are at a fixed camp for several days, you will not always bother setting them up. Most builds use a foldable panel as a backup or top-up alongside a roof array, not instead of one.
Wiring a foldable panel alongside your roof panels
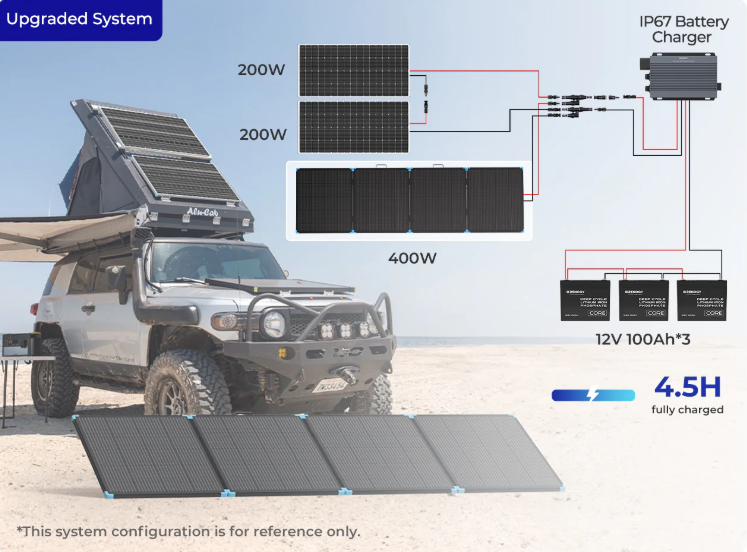
Wiring the foldable in parallel with the two roof panels feeds all three into the same MPPT controller. When you are parked in shade, unfold it into direct sun a few metres from the van. The output adds directly on top of whatever the roof panels are producing.
Pros
- No drilling, no permanent install
- Position in full sun regardless of van location
- Works at a campsite while van is parked in shade
- Good travel backup if roof panel fails
- Can be added to any existing system
Cons
- Must be set up and packed each stop
- Easy to forget or not bother with
- Not suitable as primary power for serious builds
- Risk of theft when left outside unattended
What about house solar panels?
Residential solar panels (the kind installed on house roofs) are worth knowing about, even though they are not the obvious first choice for a van. The main attraction is price per watt. A 440W residential panel like the Bunnings Powerbay N-Type costs around $1 per watt in Australia, which is significantly cheaper than buying branded van panels at the same wattage.
The catch is size. A 440W residential panel is 1762mm × 1134mm × 30mm. A Ford Transit is around 2000mm wide at the roofline. One of these panels laid lengthways across the roof spans almost the full width of the van, which makes mounting difficult. Getting two panels on the roof while leaving room for a vent or skylight is a tight squeeze. They are also heavier than van-specific panels at around 22 to 25kg each.
In the electrical guide I used house panels on my own build. They can work, and the price per watt is hard to argue with if you are fitting them out yourself. But they require more planning around mounting, and the weight adds up. For a first build, van-specific panels in 200W increments are easier to work with. If you want to go down the residential panel path, see the Van Electrical Build Guide for how they were installed.
Why you can't just mix and match panels
This catches beginners out more than anything else. Connecting mismatched panels (different brands, different wattages, different voltages) in series will limit the output of the entire string to the weakest panel. You can spend double the money on a high-output panel and have it perform no better than the cheap one next to it.
Solar panels connect to your MPPT controller in two ways: series or parallel.
Panels in series: The voltages add together and the current stays the same as a single panel. Two 200W panels at 20V each in series gives you 40V input to the MPPT. If you mix a 20V panel with a 30V panel in series, the 20V panel drags the whole string down. The MPPT sees an odd voltage and the higher-spec panel never performs at its rating.
Panels in parallel: The currents add together and the voltage stays the same as a single panel. Two 200W panels at 20V each in parallel gives you 20V input at double the current. If you mix panels with different voltages in parallel, the higher-voltage panel will try to charge the lower-voltage panel rather than both charging the battery. Output drops significantly.
The simple rule: always use the same model panel from the same manufacturer when wiring multiple panels together. Ideally buy them at the same time from the same batch. If you want to add more panels later, match them to what you have already installed. Same brand, same model, same wattage.
Your MPPT controller also has a maximum input voltage. Check this before buying panels. Connecting panels in series that push the combined voltage above the MPPT limit can permanently damage the controller. The Renogy 40A MPPT handles up to 100V input. Two 200W panels in series at roughly 40V combined is well within that. Three panels would push closer to 60V, still fine. But five panels in series at 100V is right at the limit and leaves no headroom.
For a first build, keep it simple: two matching rigid panels in parallel, feeding a quality MPPT controller. This gives you 400W of input, stays at a safe low voltage, and is straightforward to wire correctly. You can always add a third or fourth matching panel later if you need more.
Side by side
| Type | Efficiency | Lifespan | Install | Best for |
|---|---|---|---|---|
| Rigid mono (200W) | 20–22% | 25+ years | Bracket mounted, air gap | Most permanent van builds |
| N-Type rigid (320W) | 22–24% | 25+ years | Bracket mounted, air gap | High output / full-time systems |
| Flexible mono | 15–18% | 5–10 years | Bonded to roof, no gap | Curved roofs, stealth builds |
| Foldable portable | 18–22% | Varies | No install, carry inside | Supplemental / backup charging |
| Residential (440W+) | 22–24% | 25+ years | Custom bracket required | DIY builds prioritising cost per watt |
How much solar do you actually need
A rough guide: 100W of solar per 100Ah of battery, in good sun conditions. This assumes a normal day of use with a fridge running, lighting, and device charging. It is not a guarantee, it is a baseline.
Real-world factors that change this: time of year (winter cuts output significantly), your latitude, how many hours per day you have panels in direct unshaded sun, and how heavy your daily usage is. If you run a coffee machine or microwave regularly through an inverter, your daily consumption is higher and you need more solar input to keep up.
For a 200Ah battery: 200–300W of solar is comfortable in most conditions. For a 300–400Ah system: 400–600W to properly replenish what you are using. Remember, in winter you may only be getting 60% of your rated output on a good day — plan for the worst month, not the best.
Related guide: Solar and Battery Sizing Guide — Work out your exact panel wattage and battery capacity using real appliance load tables.
Related guide: Best LiFePO4 Battery for a Van Build — Choosing the right battery to pair with your solar setup. 100Ah to 300Ah options compared.
Mounting and cable entry
Rigid panels need brackets and a cable gland. The brackets bolt through the panel frame and into the van roof, typically four per panel, sealed with butyl tape to prevent leaks. The cable entry gland is a waterproof fitting that passes the solar cable through the roof. Both are low cost but easy to get wrong. The most common installation issue with roof solar is a roof leak from a poorly sealed bracket or gland, not a panel problem.
You will also need MC4 connectors to join the panel cables and extension cable to run from the roof down to your MPPT inside the van. Buy quality MC4 connectors. Cheap ones corrode and cause voltage drop over time.
See the full electrical guide for the complete install
The Van Electrical Build Guide covers MPPT sizing and selection, cable sizing, fusing, DC-DC chargers, battery wiring, and the full commissioning sequence. 55 numbered parts with AU and US links.
Common questions
Can I mix different brand panels on the same MPPT?
Not on the same input string. If you have panels from two different brands with different voltage and current specs wired together in series or parallel, the output of the weaker panel limits the whole string. If you want to add panels later and cannot match the original model, wire the new panels as a separate input string to the MPPT — most 40A+ controllers have two input trackers for exactly this reason.
How many panels fit on a Transit or Sprinter roof?
Typically two to three 200W panels on a standard length Transit, depending on your roof vent, aerial, and how much walk clearance you want. Two 200W panels is the most common setup and gives a practical 400W array. A Transit Custom or smaller van might fit one to two 200W panels comfortably. Measure your usable roof space before ordering — panel dimensions vary between models.
Do flexible panels really underperform?
In direct summer sun, yes — noticeably. With no air gap, the cells can reach 70–80°C on a hot day, compared to 45–55°C for a rigid panel with an air gap. At those temperatures, a flexible panel can be producing 15–20% less than its rated output in conditions where a rigid panel is producing close to rated. Over a day of charging, that adds up. In cooler weather or lower-intensity sun, the gap is smaller but still present.
What MPPT controller do I need?
Match the MPPT to your panel array. A single 200W panel or two in parallel stays at around 20V and 10A — a 20A MPPT handles this. Two 200W panels in series pushes to 40V at 10A — a 40A MPPT with 100V input tolerance handles this. For 400W+ arrays, a 40A MPPT is the practical minimum. Check the Renogy MPPT range — sized correctly in the electrical guide for both AU and US setups.
Should I connect panels in series or parallel?
For most 12V van builds, parallel is the safer and simpler choice. It keeps the voltage low (matching a single panel) and doubles the current. Series doubles the voltage, which can be more efficient over long cable runs but requires your MPPT to handle the higher input voltage and the cable sizing changes. If you are unsure, parallel is the right default for a beginner build with two matching panels.
The recommendation
Start with rigid panels and match them properly
For most van builds: two matching 200W Renogy rigid panels in parallel, feeding a 40A MPPT. That is 400W of input — enough for a fridge-based 200Ah system with comfortable headroom. If you are building for full-time living with heavier usage, step up to 320W panels or add a third matching panel.
Only go flexible if your roof genuinely cannot accommodate rigid panels — a pronounced curve, a hard height restriction, or a build where the profile matters more than long-term output. For everything else, rigid wins on efficiency, lifespan, and value over time.
Foldable panels are worth having as a backup regardless of what you put on the roof. They cost little relative to the rest of the build and give you flexibility when you are parked somewhere that puts your roof in shade.